
DIY Installation Tips for Wood Flooring Beginners
Installing wood flooring yourself can be a rewarding and cost-effective home improvement project. Whether you’re updating a single room or your entire house, learning the basics of DIY wood flooring installation can save you money and give your home a fresh new look. In this guide, we’ll cover essential DIY installation tips for wood flooring beginners to help you get started confidently and avoid common mistakes.
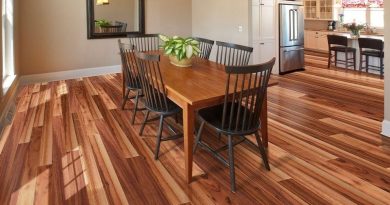
Why Choose Wood Flooring?
Wood flooring is a popular choice due to its durability, aesthetic appeal, and the value it adds to your home. It comes in a variety of styles, including solid hardwood, engineered wood, and laminate—each offering different installation options and price points.
Tools and Materials You’ll Need
Before you start your project, gather the following tools and materials:
- Tape measure
- Pry bar
- Rubber mallet
- Spacers
- Level
- Nail gun or flooring stapler
- Wood glue (if required)
- Underlayment
- Saw (circular or miter)
- Safety gear (gloves, goggles, knee pads)
Proper preparation is one of the most overlooked DIY installation tips for wood flooring beginners, but it’s critical to the success of your project.
Preparing the Subfloor
A clean, dry, and level subfloor is essential. Start by removing old flooring, nails, and debris. Then:
- Use a level to check for dips or humps. Fill or sand them as needed.
- Install underlayment to reduce noise and moisture.
- Allow the wood flooring to acclimate in the room for at least 48 hours to adjust to humidity levels.
Planning the Layout
Taking the time to plan your layout can prevent future headaches. Here’s what to keep in mind:
- Start your layout along the longest, straightest wall.
- Use spacers to maintain a consistent expansion gap (usually 1/4 inch) around the edges.
- Stagger the boards to avoid alignment of seams, which gives a more natural look and better structural integrity.
Planning ahead is one of the most valuable DIY installation tips for wood flooring beginners, especially when it comes to making tricky cuts or transitioning between rooms.
Installing the First Rows
- Begin by laying the first row with the groove side against the wall.
- Secure the boards using nails, staples, or adhesive depending on the type of flooring.
- Use a rubber mallet and tapping block to fit boards snugly together.
Continuing the Installation
Once the first few rows are solid, the rest of the installation should move quickly:
- Maintain your staggered pattern.
- Cut end pieces carefully to avoid waste.
- Periodically check for levelness and straight alignment.
- Keep the area clean and free of debris that can interfere with seams.
Finishing Touches
After all boards are installed:
- Remove spacers.
- Install baseboards or quarter-round molding to cover the expansion gap.
- Clean the floor with a product suitable for your flooring type.
Don’t skip this step—it gives the project a polished, professional finish.
Final Thoughts
Following these DIY installation tips for wood flooring beginners will help you achieve professional-looking results on your own. With careful preparation, patience, and the right tools, you can transform your space while gaining valuable hands-on experience. Remember, the key to success is not rushing the process—measure twice, cut once, and take pride in your craftsmanship.